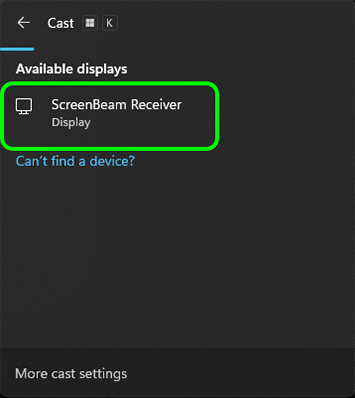
Step 1: Press Windows + K on your keyboard, or open the Quick Settings panel and select Cast
Step 2: Select your ScreenBeam receiver from the scan list.
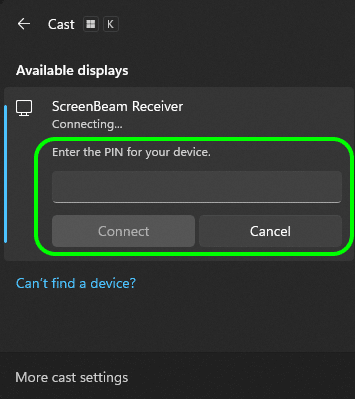
Step 3: If prompted, enter your PIN and click Connect.
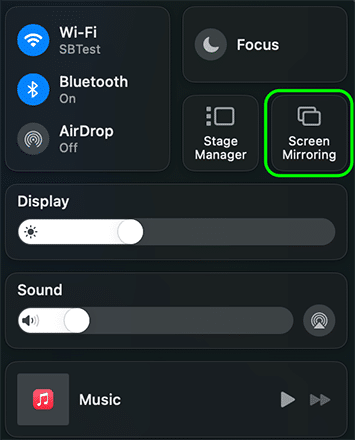
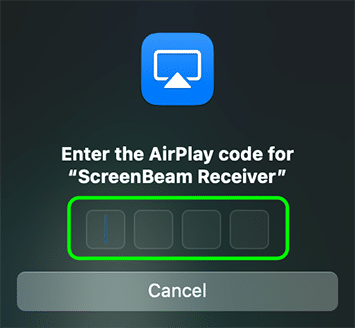
Step 1: Open Control Center and select Screen Mirroring
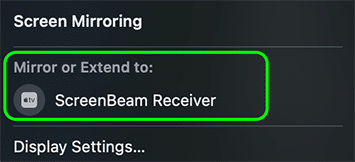
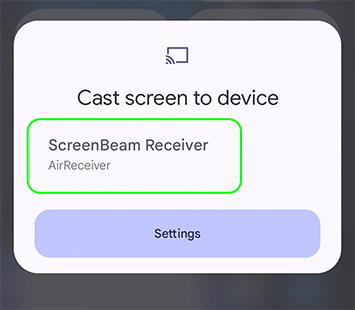
Step 2: Select the ScreenBeam receiver from the scan list.
Step 3: If prompted, enter your PIN.
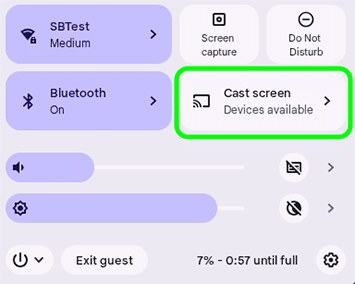
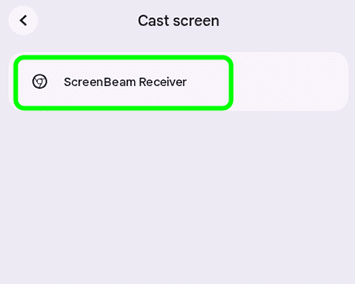
Step 1: Press Alt + Shift + s on your keyboard, or open the Quick Settings panel and select Cast screen.
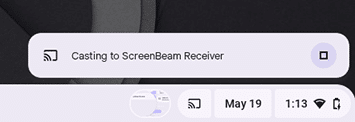
Step 3: Your Chromebook desktop will immediately cast to the screen.
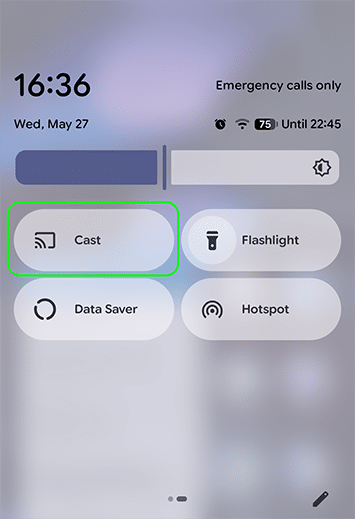
Step 1: Swipe down to open the Quick Settings menu and select Cast.
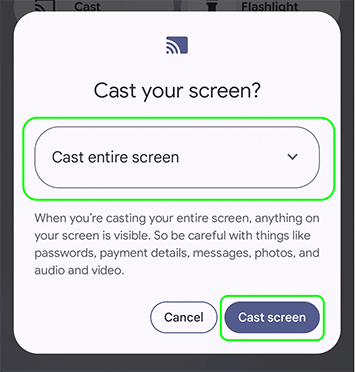
Step 3: Select a sharing option and click on Cast screen.
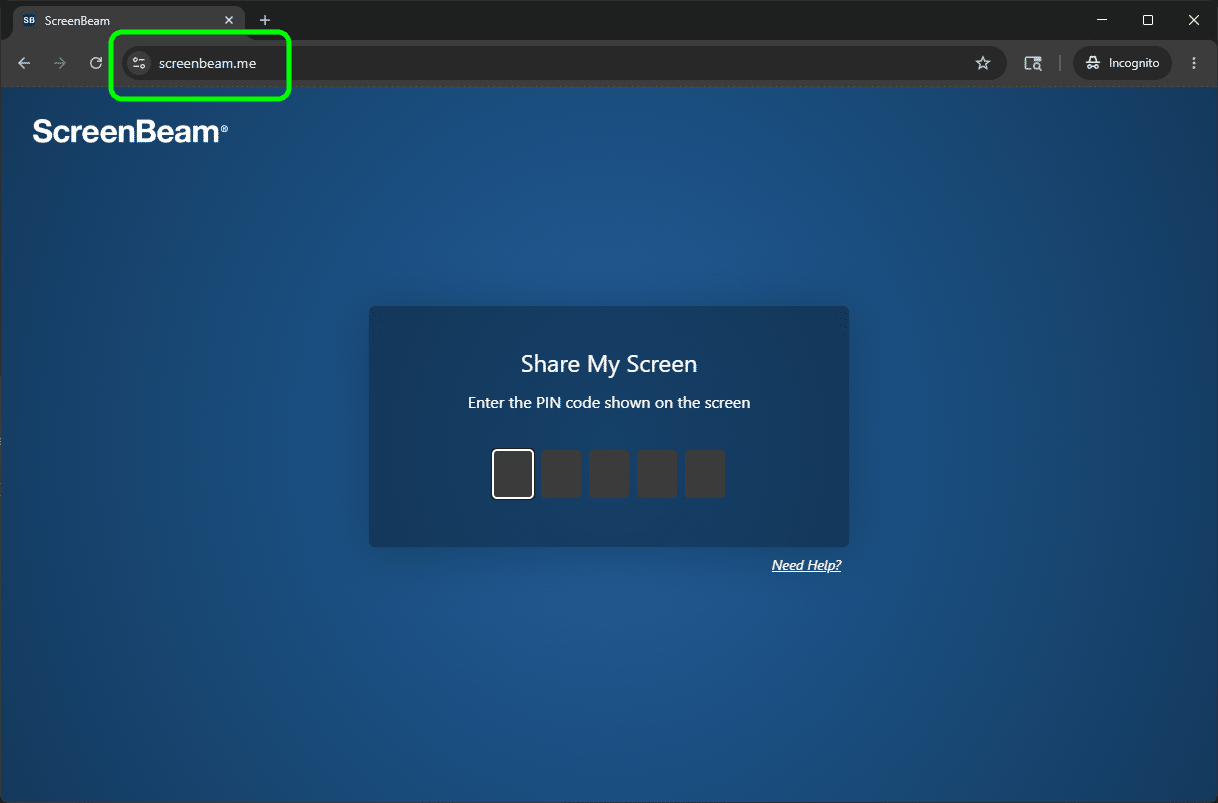
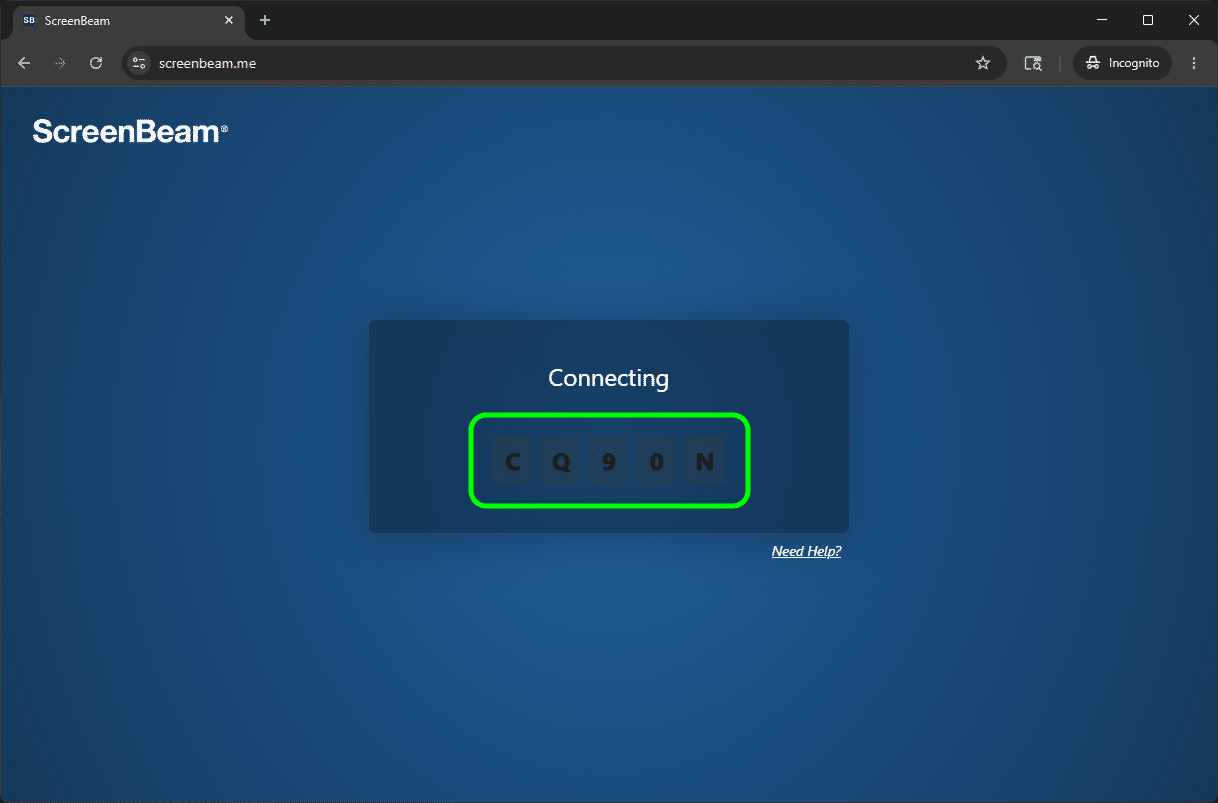
Step 1: Open your browser and go to screenbeam.me.
Step 2: Enter the PIN code displayed on the TV/projector screen.
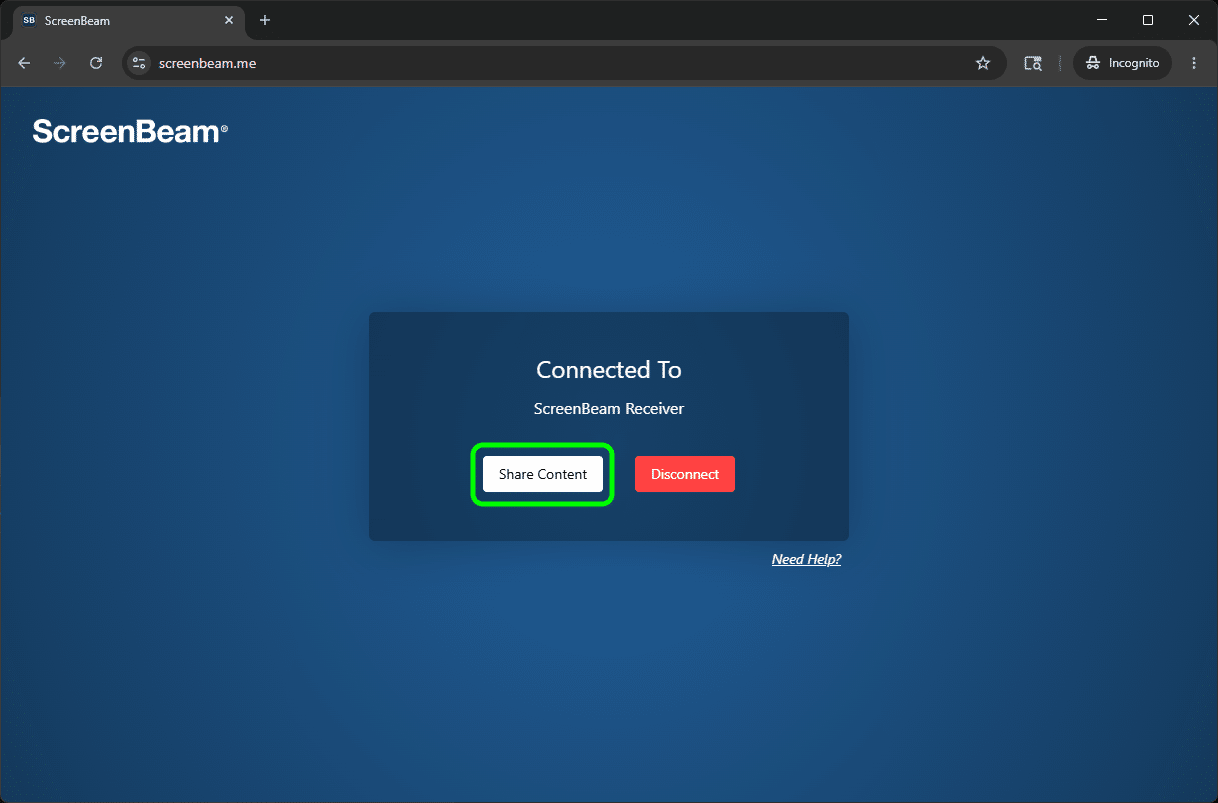
Step 3: Click Share Content.
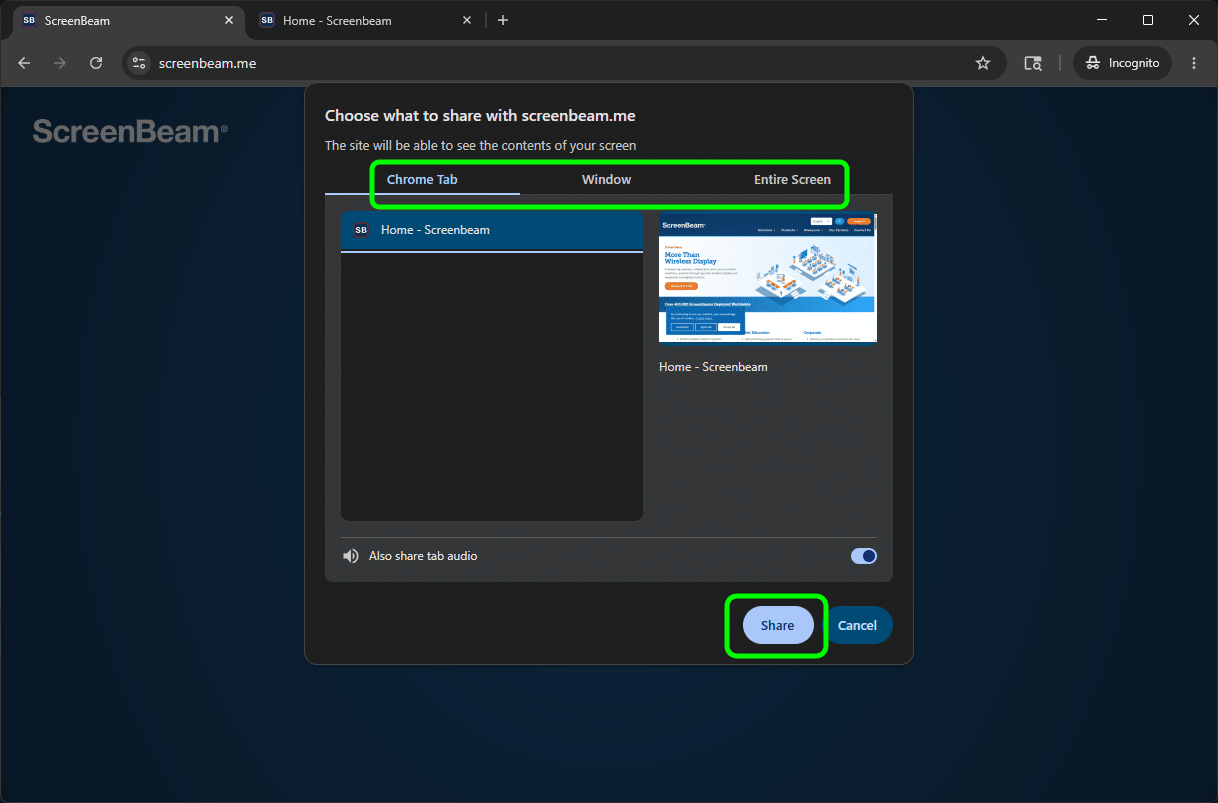
Step 4: Select a sharing option and click Share.